-
Posts
101 -
Joined
-
Last visited
-
Days Won
43
Content Type
Profiles
Forums
Calendar
Downloads
Gallery
Posts posted by Arthose
-
-
Hello @TheWitcher
Great Snow Wolf, Snow Fenrir, and Red Dusk / Red Star / Red Wind Strider Info:
Members of a clan that is in possession of a Rune or Aden Clan Hall can exchange their normal Wolf or Strider for a Clan Hall one. All they have to do is speaking to the Clan Hall Gatekeeper located outside the clan hall. A Great Wolf can be evolved into a Great Snow Wolf. A Fenrir turns into a Snow Fenrir, and Striders may be exchanged for a Red Star Strider, Red Dusk Strider or Red Wind Strider.
The Great Snow Wolf, Snow Fenrir and Red Striders possess unique skills that ordinary pets do not - the Great Snow Wolf can already be mounted at level 55. Their defense and mounted moving speed are higher than those of normal - non Clan Hall obtained - pets. At level 70 the Striders moving speed inreases from 172 to 177.
If a player loses access to a Clan Hall the obtained pets cannot be used, but they can be exchanged again for the previous pets through the Pet Trader Mickey NPC in the Towns of Aden and Rune Township.
The only way to have a wyvern is to be the clan leader of a clan that owns a castle or a Fortress.
-
 1
1
-
-
-
Date revised to this Monday 9/19/22
-
 1
1
-
 1
1
-
-
From Mantosh
"I'm sorry to announce, but due to power outage the merger is postponed until further notice Kain will restart as usual."
-
 1
1
-
-
Dear L2Togglers,
I hope this message finds you well. After much consideration, it has been decided that it is time for ‘something new’ here at L2Toggle. While more information will be available on that “Soon™”, the first order of official business is to do a little housekeeping and make room for our future plans.
When L2Toggle was created we committed to never wipe the server. That promise has been, and will continue to be, made since our Grand Opening back in May of 2020 and we have no plans on changing that now. The current server database on Kain will be added with the current Bartz database. The current Bartz database will remain intact. In short, Bartz & Kain will be merged into Bartz leaving Kain available for testing and deploying our new plans.
Our merger date is September 19th, 2022. You can expect the server downtime to be longer than usual. Afterwards, you will need to log into the Bartz server to play as Kain will be closed as we start getting things ready.
There are certain items in Lineage 2 that only can exist in one server such as the following:
· Castles
· Wards
· Clan Halls
· World State
· 7 Signs
· HeroesOur plans for the castles, wards, and clan halls are to reset these back to NPC owned. Thus, clan halls that were not available will now be available for purchase. All castles and wards will be reset so if you ever wanted to own a castle, this is a great chance to. Certain areas (SOA, Hellbound, etc…) have a world state of progression and will be the same as they currently are on Kain. The current status of the 7 signs competition will also be as it currently is on Kain. Heroes and Olympiad matches will be transferred from Kain as well.
As always, the staff here at L2Toggle appreciate each and every dedicated player on our server. Lineage 2 is nothing without friends and we have made so many in our almost 2 ½ year history. We are very excited about what is coming next and look forward to sharing it all with you….. SOON™!!!!
-
 4
4
-
 1
1
-
-
Raid Boss Names: Zaken (Nighttime)
Raid Boss Level: 60
Spawn Location: Devil's Isle
Minions: Yes
Minion Level: 57-60
Required Quest: None
Required Quest Item: N/A
Starting NPC Name: Pathfinder Worker
Starting NPC Location: Devil's IsleGuide:
Suggested Classes: Tank, Bishop, Anything else you want but preferably something with AOE skills or polearm.
Suggested Level: 61
Max Clients per IP: 8 parties (If entering with multiple parties make a command channel) You need 18 chars minimum
Suggested Gear: A Weapons & Armor
Suggested Route to Bosses: Port from Giran to Giran Harbor (Regular Port) Talk to Somulitan and move to the pirate ship.

Then talk to the Pathfinder Worker, choose Daytime - Difficult

Here on L2Toggle, Zaken ONLY spawns in the middle room, therefore, you ONLY need to check the middle room of each floor. There are a total of 3 floors and it's easy to get lost. See below map for suggest travel path AND STICK TO IT! unlike the level 85 Zaken, mobs are already here in the level 61 one.
1st Floor: Come out to the first room, hang a right, check the middle room at the red dot below. If you see Zaken running at you, great, if not, proceed on to the 2nd floor by going up the ramp.

2nd Floor. Make a right in first room you come to and check that middle room again for Zaken, still not there? Bad luck, boss is on the....

3rd Floor: Same as 2nd floor. If you don't find Zaken in the middle room you screwed something up. All I can say is good luck and happy wandering! You can /target Zaken.

Zaken is a pretty easy as long as you keep the hate on the tank. If you don't he can quickly tear through mages and healers. During the fight Zaken will spawn a ton of minions, while weak, there are a lot of them. Mages do a better job AOEing than fighters do with polearms. That said, the minions that are basically just regular mobs so they die quickly. Your healers should use mana burn to keep him from teleporting (either you or himself) to another floor.) If that happens it's SUPER annoying.Reward: C & B Grade junk, but has a 100% chance at a normal Zaken Earring.

-
 1
1
-
-
Raid Boss Names: Freya
Raid Boss Level: 85
Spawn Location: Frost Lake
Minions: Yes
Minion Level: 85
Required Quest: None (Here on L2Toggle at least)
Required Quest Item: Frozen Core (Not Required to enter but required if you don't want to die )
Starting NPC Name: Jinia
Starting NPC Location: Frost LakeGuide:
Suggested Classes: Tank, Bishop, Melee chars. Mages get hit with reflect magic shield and die very quickly.
Suggested Level: 85
Max Clients per IP: No Limit (make a command channel) you WILL need at least 2 parties. Even I use two.
Suggested Gear: S84 Weapons & Armor, full element on weapons and armor. Freya is weak against fire/strong against water.
Suggested Route to Bosses: Port from Schuttgart to Frost Lake (Noble Port) Talk to Freya's Streward and Teleport to Jinia.
If you don't have a frozen Core yet, get it from Kegor by talking to him. You want one on EVERY char. HIGHLY recommend putting it in your task bar, preferably in the same spot on each char. When you need to click this later timing is KEY so last thing you want to do is stumble around in your inventory or trying to find it on the toolbar.

Once that is done, go talk to Jinia. There are two options, Easy Freya and Hard. There is no difference between the two as far as how they act nor how to defeat them. The only differences are as follows:
Easy Freya: Weaker/Easier to kill. Drops Vorpal Armor and a regular freya necklace.
Hard Freya: Much stronger/harder to kill. Drops Elegia Armor/jewels and Mid-S84 Weapons and a bottle of Freya Soul. (Used to make a regular Freya necklace blessed.

You should farm the easy Freya for as long as you need Freya necklaces which are great for mages and healers. After you have enough of those, try Freya hard.
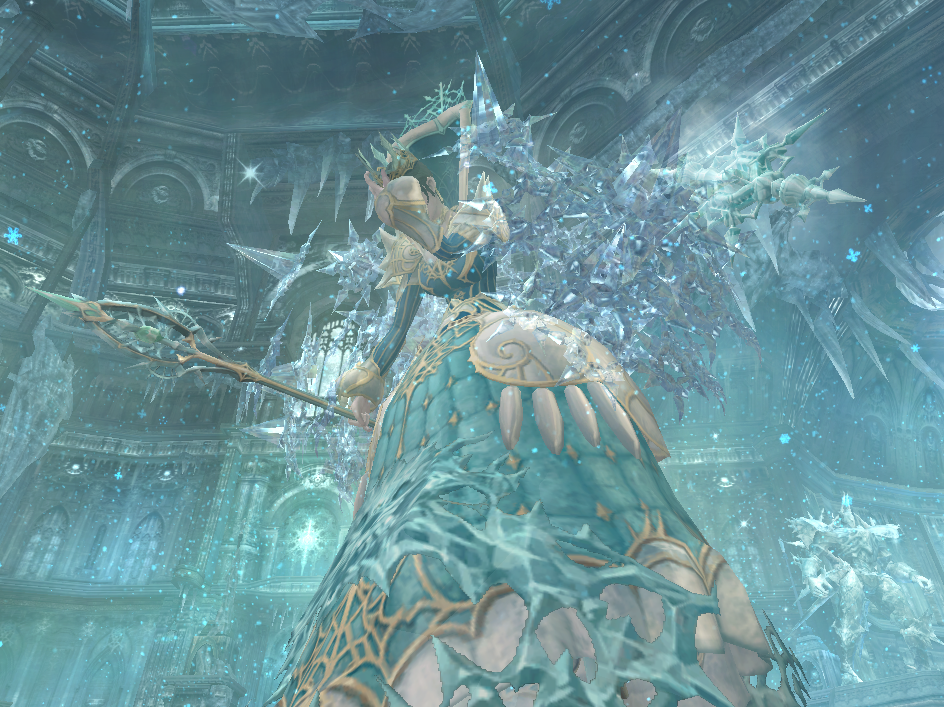
When you port in, you want to INSTANTLY run down the hallway, turn and run straight through the room and up the short staircase. Then hand a left and into the corner like a beaten red-headed stepchild. DO NOT hang out in the middle of the room. Sure it looks cool, and you will have plenty of time to look at it when you are dead from all of the minions.

Here is where you want to hide for the remainder of the raid.

You should get there right as the intro cut scene starts. Just wait there and kill any mobs that come to you eventually Freya spawns. This is Stage 1 of 3. You even get a nice little message on your screen in case the giant chick on a frozen chair that she showed up wasn't obvious. You 'should' be able to do this without her casting her ultimate ability where you will need to use a frozen core. If you do, use it. (more on this in Stage 3.)

After you spank her she runs away and makes you deal with her minions. You get a minute break to rez & rebuff up. After a minute minions spawn and slowly come find you. Kill them and wait for the next cut scene where Glakias spawns. This begins Stage 2.

Remember how I told you not to be in that big middle area? Now take ONE char down there that can attack from a distance and go hit Glakias. Then immediately run back to your corner you bad boy. Glakias WILL bring friends so be ready.

Glakias hits hard and can be an issues, especially on Hard Freya. He is one heck of a meat shield and takes a LONG time to kill. You can shorten this by triggering SoS but save your appetite of destruction for the 3rd stage and final fight. After you defeat Glakias you get another 1 minute break to contemplate life choices... Maybe now IS the time to diversify your 401K portfolio, or just be totally irresponsible and invest in something like BitCoin. Hell, a friend of mine did that and is not a retired millionaire so yeah, maybe I did F up... That's what I get for playing it safe... Oh crap almost forgot about
Stage 3. The rapture. Freya comes out the gate swinging. Start laying into her with EVERYTHING you got. Trigger SoS/App/DoD and go ham. If you didn't see her ultimate in Stage 1. You will in Stage 2. You will see the below message pop up on your screen. You have.... 5 seconds for someone in the instance to use a Frozen core. If you are working with other people have a plan that ONE person's main job is to not screw up this timing. NOTE: TURN YOUR BOT OFF FOR THIS, preferably BEFORE you get the below message. You can click the Frozen Core in your toolbar, it will turn dark like you used it, BUT because the bot was also trying to do something, it will cancel your frozen core. I can not stress this enough, ESPECIALLY for Hard Freya. Y O U W I L L D I E if you miss the frozen core timing. And not just you, everyone in the instance. Not only does her ultimate kill you by itself, it freezes everyone in your party for 5-7 seconds, while Freya and her minions continue to beat you. What is better yet, if you somehow survive, the next time she casts it, it will be stronger, and more frequent. In short, don't screw this up.

Keep fighting tossing everything you got a her. When you get her to roughly 20% life another cut scene happens and two NPCs come out to help. What they really do is give everyone in the instance a huge damage and defense boost which is appreciated, though you wonder why they couldn't have helped sooner. Almost always Freya will cast her ultimate immediately AFTER this cut scene so be ready. If you or your buddy are going to miss a core, this is the one it typically is.
Continue to kill Freya and eventually she does die.

Reward: As mentioned previously it depends if you killed easy or hard Freya. Easy Freya always drops her necklace and I believe Vorpal Armor and Jewels. Hard Freya Drops a bottle of her soul you can use to make a Blessed Freya Necklace (You need a regular freya necklace as well) along with Elegia armor/jewels and a chance at Mid-S84 Weapons. Both bosses have a chance to drop a Freya cloak which is the best in the game.
Regular Freya Necklace. (Yes, I am showing off in the below screenshot, thank you for asking :P)

Bottle of Freya's Soul

Take this item to Rafforty (Schuttgart -> Iceman Hut (Regular port)

Blessed Freya Necklace

Been a real pleasure playing with you guys! Hope you have enjoyed my guides!-
 1
1
-
 2
2
-
-
Raid Boss Names: Tiat
Raid Boss Level: 82
Spawn Location: Seed of Destruction
Minions: Yes (Many)
Minion Level: 81
Required Quest: None
Required Quest Item: None
Starting NPC Name: Hanelin
Starting NPC Location: Aden (Dark Elf Guild)Guide:
Suggested Classes: Tank, Bishop, Anything else you want.
Suggested Level: 84 At least one noble
Max Clients per IP: None
Suggested Gear: S-84, Weapons with 150 attribute, Armor 60 attribute.
Suggested Route to Bosses: Port from Gludio to Seed of Destruction (Airship Port) Talk to the Allenos. Enter the Seed of Destruction.

The first room there is only one way to go.

After you kill the mobs and break through the door you come to an "Instant Moving Device". Click Teleport.

You are now in the 'main zone' You should walk into a main room filled with many mobs. You need to destroy the giant crystal in the middle of the room. A Mage AOE Bubble works well here. If you don't have one, proceed slowly.

Below is helpful map:

Once the crystal is destroyed, kill any remaining mobs. Go back to the doorway you walked through and drop 1 adena so you know you have been here.

Some of the door are locked, and look like this, ignore them for now.
Tiat is not hard, but does cast fear on party members, have cleanse ready. he can fear a party member into mobs and thus they will die without your healer. Also, when you get Tiat to 50% life, he will cast Cure4 and full revive to 100% HP. Thankfully he only does this once. Beat the hell out of him and keep your fingers crossed for the boss weapon.

Other doors look like this. Destroy the doors by attacking them. Leave 1 Adena outside so you know you have been down this route already.

From here on it's all about breaking doors and killing mobs until you get to the end where you will find a crystal, similar to the one at the beginning of this instance. Instead of being able to teleport to a new area, this crystal has HP and you need to destroy it. When it is destroyed, head back the way you came.
When you get back to the main center room, find another door to go through and repeat the previous steps and destroy 2 more crystals. Again, make sure to leave Adena out in front of the doorway from the main room.
After all 3 crystals are destroyed you come back to the main room to find more mobs. Kill them and find the door that DOES NOT have 1 adena sitting out in front of it. That is the new path that has opened up.

Continue down this new path until you come to a new room. Run to the door, killing any mobs that aggro.

There are 'a few' mobs before the door.

There are more on the other side of the door

Kill the mobs, you will see yet another door in front of you. This one is also opens after destroying to crystals up the ramps to your left and right.


Destroy both Crystals.

Go through the previously closed doorway. A short cutscene will playout. When done head in to face Tiat.

Tiat has more than a few minions to deal with and will quicky swam you. Good news is, they are not that tough.

Reward: S84 & S80 Weapons, forgotten scrolls, and a small chance to get Tiat's Weapon, Claw of Destruction, which casts fear when you attack someone.
NOTE: This raid sucks for farming gear. It takes A LONG time to complete, is confusing, and the shear number of mobs makes it annoying. Unlike other raids, is not 100% chance for anything. Short of getting Tiat's claw, this instance is NOT (Currently) worth the time and aggravation it takes to complete it. (IMHO)


-
 1
1
-
-
Raid Boss Names: Zaken (Daytime - Difficult)
Raid Boss Level: 85
Spawn Location: Devil's Isle
Minions: Yes
Minion Level: 83?
Required Quest: None
Required Quest Item: N/A
Starting NPC Name: Pathfinder Worker
Starting NPC Location: Devil's IsleGuide:
Suggested Classes: Tank, Bishop, Anything else you want.
Suggested Level: 84
Max Clients per IP: No Limit (If entering with multiple parties make a command channel)
Suggested Gear: S Weapons & Armor
Suggested Route to Bosses: Port from Giran to Giran Harbor (Regular Port) Talk to Somulitan and move to the pirate ship.

Then talk to the Pathfinder Worker, choose Daytime - Difficult

Upon entering the instance a timer will start counting on your screen. You have 60 minutes to complete the raid. If you do the raid in a certain amount of time (Fast), each char in the instance will have a chance to earn Vorpal Rings or Earrings.
Here on L2Toggle, Zaken ONLY spawns in the middle room, therefore, you ONLY need to check ONE candle per floor. There are a total of 3 floors and it's easy to get lost. See below map for suggest travel path AND STICK TO IT!
1st Floor: Come out to the first room, hang a right, check the first candle. If Blue, Proceed to the middle room and light the other 3 candles. If Red, continue on to the 2nd floor by going up the ramp.

2nd Floor. Make a right in first room you come to and check that candle, if Blue, move to the center room and light the other 3 candles. If red, bad luck, boss is on

3rd Floor: Same as 2nd floor. If this candle isn't Blue, you screwed something up. All I can say is good luck and happy wandering!

Zaken is a walk in the park unless you are extremely under geared. He has some minions that are basically just regular mobs. You should be able to find him and kill him in roughly 1 minute ^^ (Just kidding, I got a lucky 1st floor spawn and SoS triggered quick). Your healers should use mana burn to keep him from teleporting (either you or himself) to another floor.) If that happens it's SUPER annoying.
Reward: S80 & S84 Armor/Jewels, Zaken Cloak, Forgotten scrolls and a 1/1000 chance for a BLESSED Zaken Earring.

-
 1
1
-
-
Raid Boss Names: Baium
Raid Boss Level: 83
Spawn Location: Tower of Insolence
Minions: Yes
Minion Level: 82
Required Quest: An Arrogant Search
Required Quest Item: Blooded Fabric (Can buy with FA from Dimensional merchant) - Needed on each char that enters.
Starting NPC Name: Hanelin
Starting NPC Location: Aden (Dark Elf Guild)Guide:
Suggested Classes: Tank, Bishop, Anything else you want.
Suggested Level: 84 At least one noble
Max Clients per IP: 10
Suggested Gear: S-84, Weapons with 150 attribute, Armor 60 attribute.
Suggested Route to Bosses: Port from Aden to TOI level 13 (Noble Port) Run up the stairs and around to either side, should see a crystal called Angelic Vortex.

As soon as the boss spawns you need to click the NPC chat, ON EACH CHAR! This is where having a chat command script is clutch if you are competing against others.
Upon entering run away from the door and you will come face to face with a stone statue of Baium. Have one char run up to it and click, 'Wake Baium'.

Baium will then spawn and the raid officially starts. At this time NO ONE else can port inside anymore, doesn't matter if they are your party / command channel. Baium's minions, several angels with polearms will also come down from the heavens to greet you.

The first person who hits Baium either with a physical attack, skill, or debuff will instantly die (No matter what) so make sure you have noble.

After that, you can attack him freely. Baium is pretty easy as long as you have S80-S84 gear and some resists. Just beat the heck out of him until he is dead. The angels re-spawn quickly if killed so either ignore them and power through their damage or kite them away with the tank leaving your DDs to fight Baium.
Make sure you also pull Baium off of the ledge a little bit, otherwise items can drop there and you won't be able to pick them up.


Reward: S80 Weapons/Armor/Jewels. S-Weapon and Armor scrolls, forgotten scrolls, and of course, the Ring of Baium (not +10 though).

Best of luck on your next raid! I'll be watching!

-
 1
1
-
-
Raid Boss Names: Valakas
Raid Boss Level: 85
Spawn Location: Forge of Gods
Minions: None
Minion Level: N/A
Required Quest: Into the Flames
Required Quest Item: Vacualite Floating Stone (Can buy with FA from Dimensional merchant)
Starting NPC Name: Klein
Starting NPC Location: Forge of GodsGuide:
Suggested Classes: Tank, 2 Bishops, Melee do much better than mages, especially for surviving.
Suggested Level: 85+ all noble
Max Clients per IP: 10
Suggested Gear: S-84, Weapons with 300 attribute, Armor 120 attribute. Everything +10 or higher.
Suggested Route to Bosses: Port from Goddard to Forge of the Gods (Regular port) follow the below map.

Before you enter there are a couple of thing that can make your life easier. The first will actually make it easier next time you kill Valakas. When you get to Klein take the quest called Jewel of Valakas. After you kill Valakas return to Klein and he will give you an item called Jewel of Valakas which allows you to instantly teleport to Klein in the future. The item is NOT tradeable so everyone in your party/clan should get it.

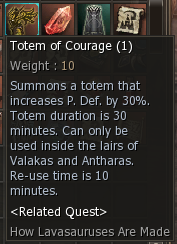
The 2nd item, and probably the most important is the below totem. You get it from the "How Lavasauruses Are Made" Quest. There are other totems you can get from the quest but ONLY one totem can be active at the same time. The other totems are WORTHLESS in comparison to this one.

As far as buffs, If you didn't put fire resist on at least 3 of your items for, take a +++ Resist Fire buff.Once you get to Klein click on the 3rd option, I want to enter the hall of flames. Run up the curvy ramp.

Follow the below map. There are a couple of raid bosses along the way that will drop items you can use at Valakas. Scroll: Slay Valakas and Scroll: Protection of Valakas. Use protection on tanks and bishops, and Slay on damage dealers.

To enter you HAVE TO be part of a command channel to port in and start the raid. HIGHLY recommend bringing friends for this one. Even a low level bishop can do wonders by staying far away from the fight and rushing in to cast an Ally Mass Rez at a key moment when the bishops are dead.
Once in you have 10 minutes until Valakas spawns to prep, not much to do except run to your favorite corner that doesn't have lava and put down the first defense totem. Only reason for running to a corner is it keeps your chars close when they get feared.
This is my go to spot:

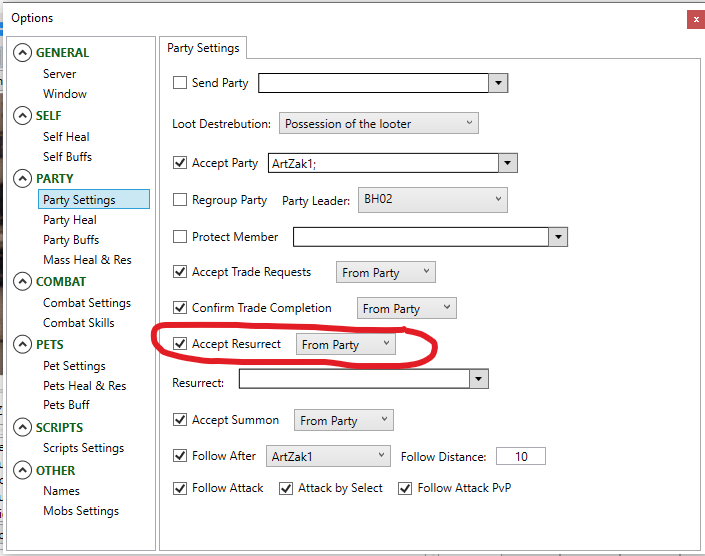
Valakas spawns and then will come over to say hello. Valakas will test you and your bot settings. Auto Rezzing and accepting rez here is key along with re-casting noble buff. Fully expect to lose buffs at some point. It will happen. When it does, get the char away from the fight, rebuff, and send them back in. Keep an eye on your debuffs, especially fear. If you are using an SK for a tank cast Smart Cubic.

The worst thing that can happen is the bishop gets feared. That's why bringing a 2nd bishop is a good idea...
Like this:

If you have it all, try for a SOS/Appetite of Destruction/Day of Doom combo for maximum damage.

Use SoS as often as you can trigger it. All chars should have BREZ in case things go really bad. Fully expect to lose multiple party members at the same time. Save your mass rez for when you REALLY need it. Make sure you also have plenty of death recovery scrolls.

Unlike Antharas, Valakas doesn't change throughout the raid so at least you have that going for you. That said, if you find a way to power through it, some of the best loot in the game is yours.

Reward: Top & Mid S84 Weapons, Top S84 (Elegia) Armor & Jewels as well As Mid (Vorpal) Armor including Vorpal Shoes. BEWS, BEAS, Forgotten scrolls, and of course, the Necklace of Valakas

Hope this helps!

-
 1
1
-
 1
1
-
-
Raid Boss Names: Antharas
Raid Boss Level: 85
Spawn Location: Lair of Antharas
Minions: Randomly spawns two types of smaller dragons, look like giant gem dragons. They are just meat shields.
Minion Level: 85
Required Quest: Audience with the Land Dragon
Required Quest Item: Portal Stone (Can buy with FA from Dimensional merchant)
Starting NPC Name: Gabrille
Starting NPC Location: Giran (Main square)Guide:
Suggested Classes: Tank, 1-2 Bishops, Melee do much better than mages, especially for surviving.
Suggested Level: 85+ all noble
Max Clients per IP: 10
Suggested Gear: S-84, Weapons with 300 attribute, Armor 120 attribute and higher.
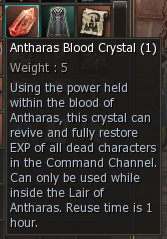
Suggested Route to Bosses: Port from Hunters Village to heart of antharas lair (Noble port)Before you enter there are a couple of thing that can make your life easier. The first is making an Antharas blood crystal. You need an item dropped from the 7RB quest as well as one dropped from the 3RB quest. Take both items to the separated soul NPC in Hunter's village and he will make you one. It's basically an extra mass rez. Item is tradable.

The 2nd item, and probably the most important, is the below totem. You get it from the "How Lavasauruses Are Made" Quest (In FoG). There are other totems you can get from the quest but ONLY one totem can be active at the same time. The other totems are WORTHLESS in comparison to this one.

As far as buffs, you can remove resist shock unless you expect PvP. Antharas stun chance is 100% so there is no point in wasting a buff slot. If didn't go 3 items for Earth resist, take a +++ Resist Earth buff.
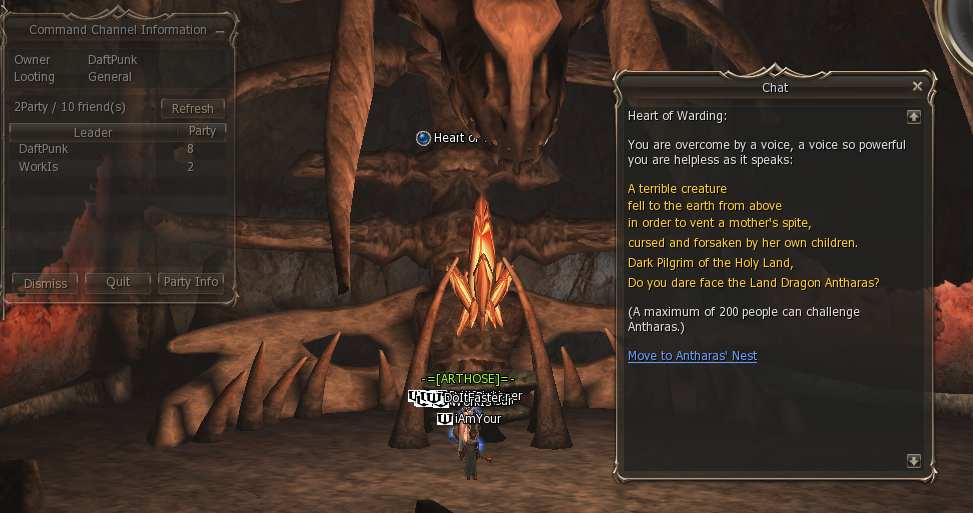
To enter you HAVE TO be part of a command channel. HIGHLY recommend bringing friends for this one. Even a low level bishop can do wonders by staying far away from the fight and rushing in to cast an Ally Mass Rez.

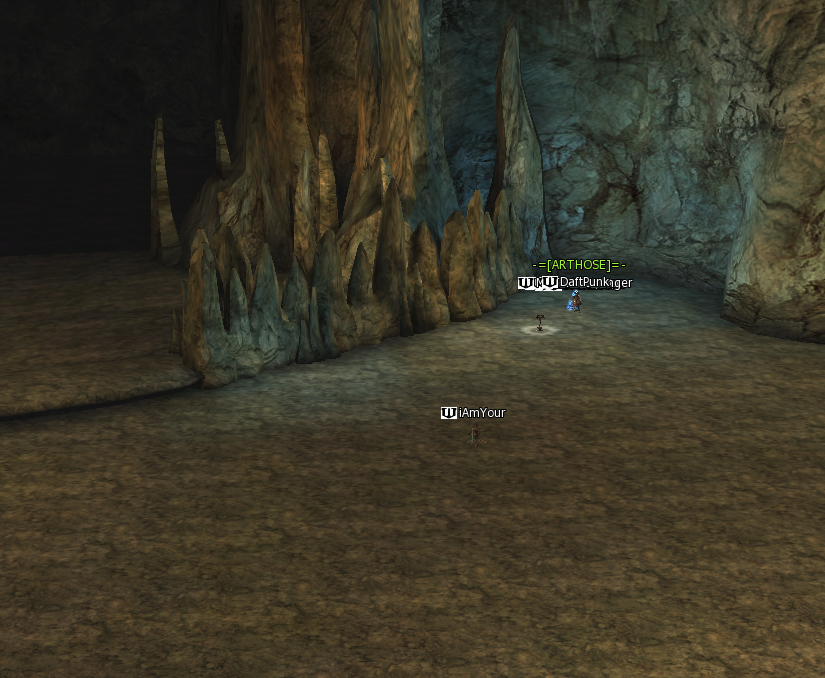
Once in you have 10 minutes until Antharas spawns to prep, not much to do except run to your favorite corner and put down the first defense totem. Only reason for running to a corner is it keeps your chars close when they get feared. I usually sit just off to the right.

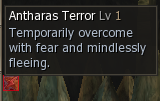
Antharas has some surprises for you. Besides just kicking the **** out of you with his attacks, he also casts varies debuffs. You can look forward to random fear, stun, and "The Curse of Antharas" which basically is like Day of Doom for anyone who gets it.


If you have Kamaels, have them use soul cleanse on each other. If a non-Kamael char gets a debuff, use Cleanse from one of your bishops. Remember Cleanse from bishops require Einhasad's Holy water from the basement of ivory tower.

First thing you should do is go ahead and get your ultimates out of the way. That is, your SoS/App/DoD Combo, BEFORE the chain stuns begins. Damage can be nice.

From 100% life to 50% life, Antharas is.... manageable. Gives you that false feeling of hope. At 50% life Antharas starts doing his AOE Stuns which have 100% land rate and can not be prevented. The only thing that 'helps' is using a smart cubic on your tank if you have the skill. It sometimes removes the stun early.

From 15%? life to 0% life Antharas does that same unblockable AOE Stun, roughly every 20-30 seconds. And it stuns you for roughly 7 seconds. But don't worry, while you are stunned he continues to attack, cast fear, and curse you and your clan mates. What? You were hoping for something more positive?

The name of the game here is defense. Greater shield over Greater might, as much earth resist as you can stack up, Zerk is not your friend. While you are doing 'less damage' the amount of damage you lose being dead on the floor and recasting noble and worse, rebuffing, is much more. That said, try and trigger SOS on your tank as much as possible to bring the dragon down faster.
Reward: Top & Mid S84 Weapons, Top S84 (Elegia) Armor & Jewels as well As Mid (Vorpal) Armor including Vorpal Shoes. BEWS, BEAS, Forgotten scrolls, and of course, the Earring of Antharas

Best of luck on your quest to beat Antharas!

-
 1
1
-
 1
1
-
-
Raid Boss Names: Behemoth Leader, Drake Lord, Dragon Beast
Raid Boss Level: All 3 bosses are 85
Spawn Location: Lair of Antharas
Minions: None
Minion Level: N/A
Required Quest: Don't Know Don't Care (Req'd Level 84)
Required Quest Item: None
Starting NPC Name: Separated Soul
Starting NPC Location: Ghost at Hunter's Village and around DVC. Can start/end quest at any of the NPCs.Guide:
Suggested Classes: Tank, 1-2 Bishops, whatever else you want to bring.
Suggested Level: 84+
Max Clients per IP: None (To get the quest item either your party has to get the last hit or, if working together with multiple parties, all parties must be in command channel. Every char MUST hit the boss to be able to get the quest item after it is defeated!)
Suggested Gear: S-80 and above, Weapons with 150 attribute or higher, Armor with 60 attribute and higher.
Suggested Route to Bosses: Port to Hunters Village. Take the quest (Don't know Don't care) from the ghost NPC (Separated Soul) on every party member of every party that is going. IF GOING WITH MULTIPLE PARTIES DO NOT FORGET TO MAKE A COMMAND CHANNEL! If you don't only the party that gets the last hit will get the quest item.

Once everyone has the quest and your party(ies) are formed, buff, and port to the entrance of Antharas lair from the separated soul NPC.
Follow the map below but basically run it, make the first right and hold the right wall.

The first boss is Behemoth Leader. None of three bosses are particular difficult or do anything annoying. Just take a while to kill. Reminder that everyone in the party must hit the boss, including healers! Unlike other raid bosses, these bosses only have a 20% chance of dropping an item called "Will of Antharas" used to make an Antharas Crystal (Used to Mass rez those Antharas Instance)

Unlike other bosses though, after the boss dies it will spawn a dead NPC that you can talk to. Talk to it, WITH EACH PARTY MEMBER and search the body, to get the quest item.


When everyone has the quest item return to hunters.
Go back to the ghost NPC and port to the magic force field bridge. Up to you which boss you do first, doesn't matter, I typically go around the circle first. Careful there are A LOT of mobs running around the circle and archers! All of which are agro. Recommend running with the flow of mobs rather than against, unless you like a challenge.
Once you kill the mobs that have followed you, start smacking the Dragon Beast until it is dead. Again, nothing special about this boss.

Once dead, talk to the NPC that spawned in it's place and search it's body with every party member. Up to you if you want to .hunters or run back across the circle. Either way, go back to the 'magic force field bridge' port spot. This time go away from the circle down the twisty path to the lower level of LOA. Follow the map to the final boss, the Drake Lord.

Again, nothing special, kill, talk to NPC, search body. When done return to hunters village. Talk to the Separated Soul and turn in the quest.
Reward: Your reward on this quest is random but consists of one or more of the following: (in order of likelihood)
Attribute Crystal(s)
3 Gemstone S
EAS
EWS
BEAS
BEWS
Random Vorpal Jewerly
Random Vorpal Armor (including the very rare Vorpal Shoes!)
Random Mid-S84 Weapon.
For very little work you and your clan can get some VERY good items by doing this quest every day.-
 1
1
-
 1
1
-
-
Raid Boss Name: Frintezza (Scarlet Van Halisha)
Raid Boss Level: 85
Spawn Location: Imperial Tomb
Minions: Before boss
Minion Level: 83
Required Quest: Only to get quest item on party/command channel leader
Required Quest Item: Frintezza's Magic Force Field Removal Scroll (Can be bought for 10FA at Dimensional Merchant (Recommended way!))
Starting NPC Name: Ghost at start of Imperial Tomb
Starting NPC Location: Imperial TombGuide:
Suggested Classes: Tank, 1-2 Bishops, 1 mage, whatever else you want to bring.
Suggested Level: 84+
Max Clients per IP: None?
Suggested Gear: S-80 and above, Weapons with 150 attribute or higher, Armor with 60 attribute and higher.
Suggested Route to Boss: Buff up and port from Goddard to Imperial Tomb (Noble port) and run in. After the short little hallway you come to a large round room, head right to the ghost and graveyard.

Partial map below of the first 2 rooms. Upon entering the instance you will be in the lower round room. There is a single mob called "Camera". Attack it disappears at which time the first set of doors opens up revealing 100+ mobs.
While individually weak, there are still 100 of them. Drop a bubble from your mage to deal with them quickly before they overwhelm you. (Make sure you buy the "Magic Symbol" item needed to cast a bubble from the basement of Ivory Tower!)

After killing all of the mobs in this room, the door opens to the 2nd room, go town the hallway and into the 2nd room. You will see 4 skeletons in the middle of the room. Kill them and again the doors will open revealing more mobs. This room is much easier than the first and doesn't require a bubble. Run around the room killing all the mobs. When done, the door to the 3rd and final room will open.

Mobs in the first two rooms drop the below item. You can use it to destroy the paintings called "Evil Spirit" in the boss room. I don't recall what doing this does for you, at least here on L2Toggle I have noticed no improvement for destroying them nor penalty for not destroying them.


After a brief wait Frintezza will appear and starts playing the organ. Scarlet Van Halisha appears and starts whacking away at you. The boss is very easy depending on your party makeup and gear. Just a matter of time when it dies for you. There is no 'trick' or 'skill' here, just beat the hell out of the boss. The boss has three stages. Other than the animations and the boss getting bigger there is not much difference in the way the boss acts at each stage. I suppose it gets minimally more difficult at each stage.
Stage 1:

Stage 2:

Stage 3:

Reward: Your reward on this one is Frintezza's necklace and a chance at Vorpal armor and Vesper weapons as well as other forgotten scrolls. Frintezza is one of the few ways in the game to get Vorpal Shoes. The Vorpal Robe set is by far the best healer robe set in the game. The Necklace increases resistance to sleep/stun/para by 15% and increases the chance of you landing sleep/stun/para by 15% which is great for any class, especially warlords and tanks. The necklace also decreases skill re-use time and has a passive damage shield effect.


One note is the Frintezza instance continues for 15 minutes after the boss dies, this is 3x longer than the regular 5 minutes you have after Zaken and Freya, for this reason, if you are instance farming, I recommend farming Frintezza LAST.
-
 1
1
-
-
Raid Boss Name: Core
Raid Boss Level: 40 (Passive)
Spawn Location: Cruma Tower (Dion)
Minions: Yes (Roughly 80 of them and all agro)
Minion Level: 42-44
Required Quest: None
Required Quest Item: None
Starting NPC Name: None
Starting NPC Location: N/AGuide:
Suggested Classes: Tank & 2 Bishops with noble and blessed blood and 6-7 mages (Sorc or SPH). Melee classes are worthless here.
Suggested Level: 43
Max Clients per IP: 10 (There is a level cap starting and no transformation, break these rules and you get a free ride back to town)
Suggested Gear: C-Grade, +6 or higher on all weapons/armor/jewels Higher on tanks and bishops. Going in here with +0 gear is BAD time.
Suggested Route to Boss: Buff up and port from Dion to Cruma Tower (Normal port) and port into the tower, then port up to level 2. Run down the ramp and hang a left or right. I've run both routes and is about the same time. Map below is my route. Port up to level 3. Clear the mobs (Or not) and port into the boss room.

If ever there was a raid where having friends would help this is it. All of the mobs on the 3rd (Boss) floor are boosted. Roughly 10x health with improved damage/defense. To make things more enjoyable for you, our GM Mantosh has doubled, tripled? the number of mobs Core has. There are roughly 80 minions on L2Toggle!


Now that you are inside, you should be seeing something like the below. Before you just run up to the boss and die please read.

Take off and Zerk/Zerk Dance from your tank. Last thing you need is lower P.Def for the guy taking the agro. If you didn't bring a noble char, log out now and save yourself the embarrassment of trying to do it without. This is by far the hardest boss currently on L2Toggle.
If you haven't already, set mages to 70 range, healers to 120+. Healers should be spamming blessed blood on themselves and have automatic rez on anyone that dies, prioritize the other bishop. If both bishops die the rest of your party will be dead in the next 2-3 seconds. All chars should be set up to accept rez and re-noble immediately after rezzing. Your chars WILL die. My party has +10 armor and +12 weapons, THEY DIE. In case you haven't gotten the point, this boss is not to be F***'ed with lightly. You get one shot to do this or face wiping and running all the way back up.Now that your chars are set up, it's time to get in position. You see this wall? This is your buddy, snuggle up close and don't let go. Follow the path to not pull agro on your way. You don't need a stray mob coming to say, "Hi" before you are ready. When done, your tank should be in front, mages in the middle, healers on the end. This spacing is EXTREMELY IMPORTANT on this one. Some of the mobs have polearms and will make short work of mages and healers. You need to keep the mobs on the tank, and make the distance between the tank and your healers as big as possible but still within the AOE kill range of the nukers.


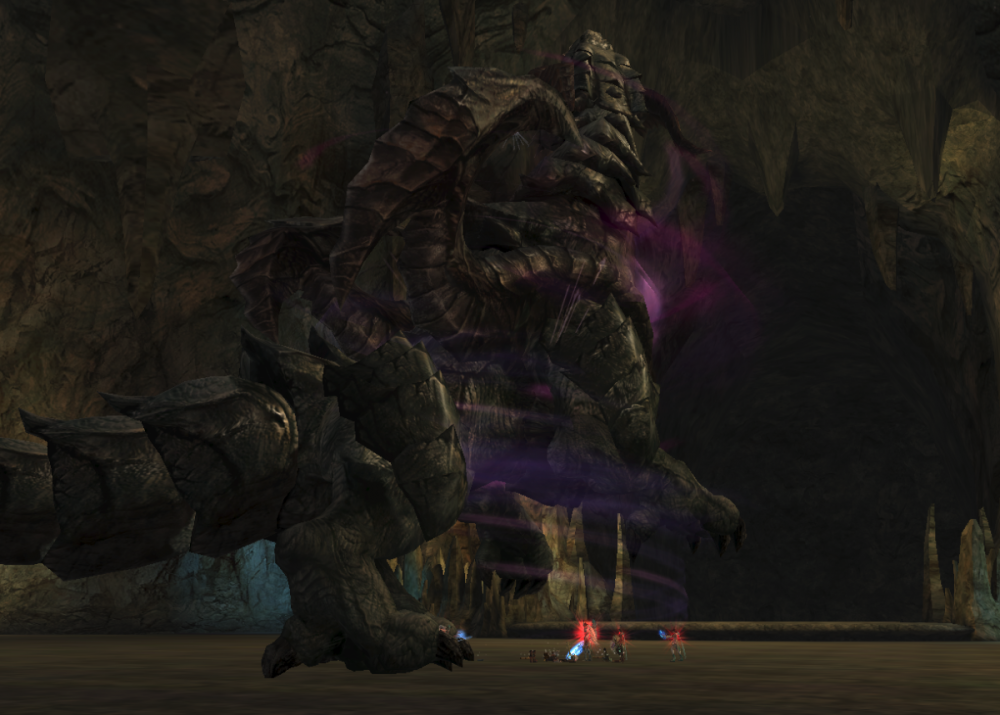
Okay, you are in position, it's time to unleash hell. Turn off all your bots (Push insert for adrenaline users) and take your tank out around the corner. You want to grab a handful of mobs which you will be able to do just by running around. DO NOT HIT/AGRO/HATE it yet! You DO NOT want just 1 mob, the idea here is to split those 80 mobs into two groups of 40. When you got a good amount of mobs on the tank run back to your buddy (the wall) and try to get back to the same spot you were when you turned the bots off. Give your balls a tug, and press insert again.Resist the urge to use your hate aura here. As crazy as this part will get, there are MORE mobs (than the ones currently beating the hell out of you) on their way. Change targets quickly if you are not using the bot to target and all mages spam AOE, AOE, AOE. Damage = Agro = Mobs hitting Mages = mages dying/getting healed = agro on bishops = Dead bishops = failed raid. Things go bad QUICK. That said, HOLD your hate aura until....
 <--Imagine taking a screenshot in this moment.
The 2nd wave of mobs arrive, you know, the ones you have been ignoring after that first pull that almost killed you. Again, resist the urge to immediately press hate aura until the middle of that wave are around the corner. You have about a 1 second window here to time it. Too soon and not enough mobs get hit with it and the 2nd round of mobs will target the bishops and die, too late and the bishops will already be dead by the time you take the agro. As soon as you hate Aura, UD.
Your bot settings, gear, everything is tested here. Haven't a simple heal setting here like (Cast battle heal if HP<50%) won't cut it here! There is rezzing, panic healing, noble buffs, AOE, Blessed blood activating. Tanks should spam anything and everything to reclaim as much agro as possible. Good Luck!

If you didn't completely wipe, congrats, rez any dead chars, rebuff, renoble move to Core. Yes, you still have the boss to kill. Core itself isn't that bad, it has an AOE nuke that damages cause that's all you need right now, more damage. Again, positioning is important. Have the tank away from the mages away from the healers, but all within the AOE range of the mage nukes. The mobs WILL respawn! Multiple times until Core is dead. It 'Should' be easier as the mobs will respawn in relationship to when they die, but you will still have a lot of mobs on your chars. If things start going bad, hopefully your hate aura is ready, again, try not to use it unless things really go bad. Remember, you don't have UD anymore so sometimes taking ALL the agro on the tank all at one time isn't best idea.Reward: For your epic fight, Core drops a ring and other C/B items/enchants. It has a nice boost to magic crit damage and casting speed making it a great ring for mages.

Again, this is by far the hardest boss to kill, I occasionally still wipe at this raid. Before my gear was as +++ as it is now, I have actually failed this raid with as many as 3 parties before. I will leave you the below quote and Best of luck to those who attempt it.
“It is not the critic who counts; not the man who points out how the strong man stumbles, or where the doer of deeds could have done them better. The credit belongs to the man who is actually in the arena, whose face is marred by dust and sweat and blood; who strives valiantly; who errs, who comes short again and again, because there is no effort without error and shortcoming; but who does actually strive to do the deeds; who knows great enthusiasms, the great devotions; who spends himself in a worthy cause; who at the best knows in the end the triumph of high achievement, and who at the worst, if he fails, at least fails while daring greatly, so that his place shall never be with those cold and timid souls who neither know victory nor defeat.”-
 1
1
-
-
Raid Boss Name: Ant Queen
Raid Boss Level: 40 (Passive)
Spawn Location: Ant's Nest (Gludio)
Minions: Yes (Many)
Minion Level: 35-38
Required Quest: None
Required Quest Item: None
Starting NPC Name: None
Starting NPC Location: N/AGuide:
Suggested Classes: Tank & 2 Bishops and 6-7 mages (Sorc or SPH) . The only Melee class which stands half a chance would be gladiators spamming AOE skills. Due to the high likelyhood of PvP over AQ, noble chars are > non-noble.
Suggested Level: 43
Max Clients per IP: 10 (There is a level cap starting and no transformation, break these rules and you get a free ride back to town)
Suggested Gear: C-Grade, +6 or higher on all weapons/armor. +++ Jewels not required for PvE, but def for PvP.
Suggested Route to Boss: Buff up and port from Gludio to Ant's nest (Normal port) and run down into the cave. If you hug the right wall you can't get lost and if the safest route. If you see a giant bridge you are going the right way.
The only thing more gaping this this entrance is your mom and just as many players have been in it.

Now that you, and everyone else, are here looking at the boss, it's time to kill it. AQ hits hard, the minions are not overly powerful but are fast and can quickly swarm you. There are 5 types of mobs which I will describe below:
Guard Ant: Regular mob in the boss room, only mob that is agro there. Guessing they have roughly 10X HP and boosted attack/def. Very high aggro range, and are social. Smack one of these and you can expect him and his homies coming. Slow respawn time
Royal Court Ant: Stronger than your regular guard ant. When you see these boys rushing you have your hate aura ready, and the Queen isn't far behind! Slow respawn time.
Nurse Ant: Weak and slow, Heals both Queen Ant and Queen Ant Larva (for about 5% health each heal) with priority being on the larva if it is at 0 HP. As soon as it has some HP, nurses will go back to healing Queen. Almost instant respawn time.
Queen Ant Larva: Doesn't attack, doesn't move, can't die. Nurses prioritize healing the larva over healing the Queen.
Queen Ant: Boss, duh, hits like a mule kicks and just as fast, recommend you bring a tank or you're going to have a bad time.
My strat? Set mages to 70 follow distance and healers to 120, then time to pull a LEERRRROOOOY JENNNKINS!!!!! Just run right past the guard ants, royal guard ants, nurses, queen, and straight to the Larva like you are Princess Vespa getting married in Space Balls. (REALY dating myself here aren't I?)
Once to the larva, wait for the mages, healers to catch up (This is a good time to remove Zerk and Zerk Dance on your tank for extra P.Def) and then target the larva. Your mages should be set to spam AOE skills as well as their main nuke. Prioritize AOE over single nuke. Done correctly, Larva should be at zero HP, any guard ants that followed you back to the larva should be dead. The queen and all her boys "Should" be coming to greet you. (If not, for sure the nurses will be walking over to heal the larva and as soon as you hit one of them with an AOE everyone will come then.) At this point you will see a very angry and strong queen and like 10 guards rushing which ever poor soul the agro is on. Resist the urge to completely panic and have your Hate Aura skill ready. When they get in range hit hate Aura and UD if your gear is not great. Then focus on attacking the queen only and spam aggression to keep hate on tank. Rez any dead mages quickly. Royal guards should die quickly enough leaving you with a Queen, nurses, and the larva.
The MOST important part of killing the AQ is location, location, location. The below picture demonstrates perfect positioning.
If you set your mages to 70 range and healers to 120 your mages should be on top of the boss but still within AOE range of the larva. Keeping constant AOE damage to the larva is important so that if the nurses do get a heal off, they heal the larva and NOT the queen. After this, it's pretty much sitting and letting mages do what they do best. Mages should be set to 'glass cannon' mode (Zerk/Zerk Dance) unless you have high +++ Weapons. +6 is really a minimum and obviously you want Acumen on those mage/healer weapons and health on the tank weapon.Reward: For your time AQ drops a ring. It has a nice boost to crit damage and accuracy largely worn by fighters classes.

-
 1
1
-
 2
2
-
-
Raid Boss Name: Orfen
Raid Boss Level: 60 (Aggro)
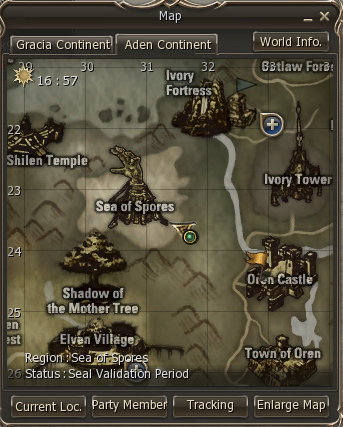
Spawn Location: Random location in Sea of Spores (Oren), moves to nest at half life.
Minions: Yes (Many)
Minion Level: 58-59
Required Quest: None
Required Quest Item: None
Starting NPC Name: None
Starting NPC Location: N/AGuide:
Suggested Classes: Tank & Bishop for sure. Melee with poles survive his from minions if tank loses aggro but mages do a much better job AOEing. If you are going Melee, think about bringing an SE for Stigma or leveling your bishop to 76, getting Stiga with holy polymander and then deleveling back to 61. When making a party for Orfen, think about using this party for level 61 Zaken.
Suggested Level: 61
Max Clients Per IP: Unlimited (Stage 1 in Sea of Spores) 10 (Stage 2, at nest)
Suggested Gear: A-Grade. Can be done with +0, obviously higher ++ is better.
Suggested Route to Boss: Buff up and port from Oren to Sea of Spores port (Normal port) and run into Sea of Spores.
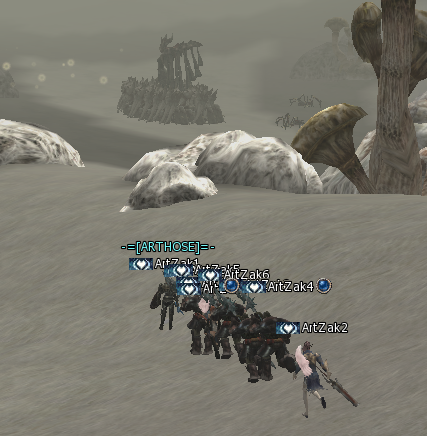
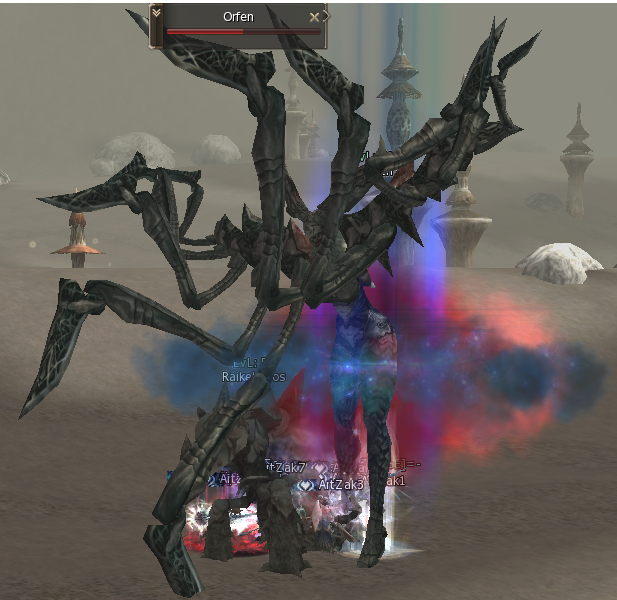
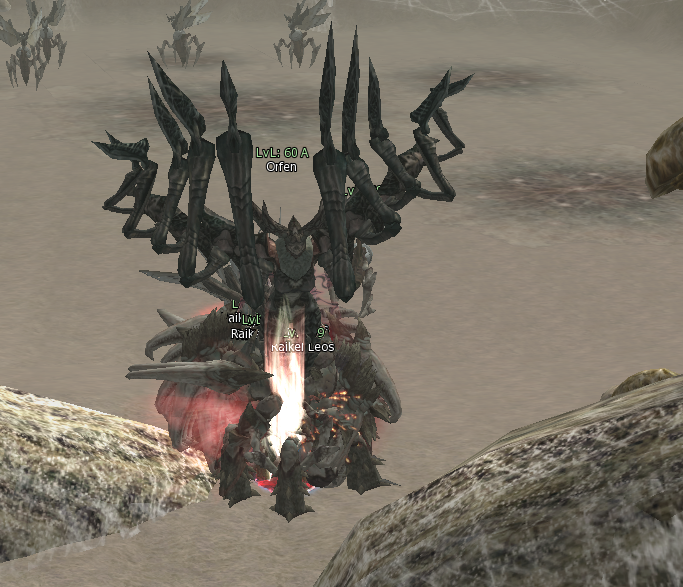
Orfen spawns randomly in Sea of spores and moves around. She can be found by either spamming /target Orfen (Macro) and/or by looking for a giant in the distance.

When first pulling Orfen you will get rushed by her minions, resist the urge to UD here. You will need it later. Depending on your party you can either focus on Orfen and kill the minions with AOE. (Spam Hate Aura to keep aggro) or you may need to kill some of the minions to keep your party alive. When Orfen reaches 50% life she will instantly teleport back to her nest.

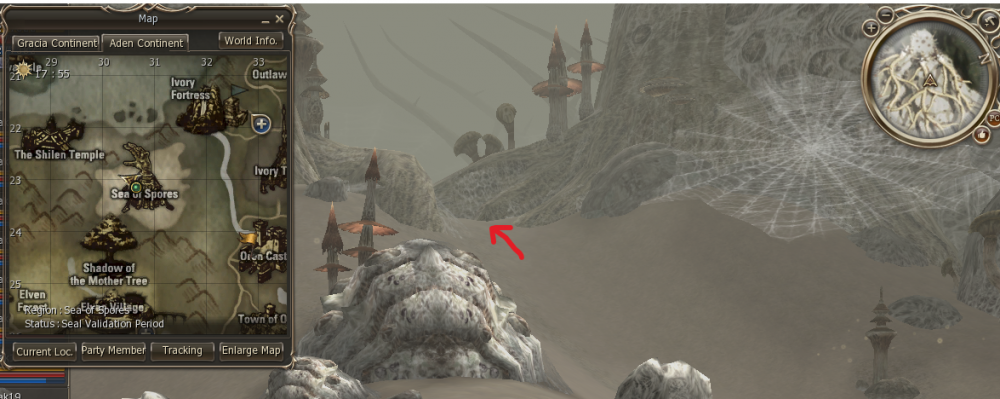
Go deeper into Sea of Spores after she teleports and look for a way into the nest. I typically go up this path near the giant spider web.
During the 2nd stage Orfen act the same, just with more minions to make it ever harder for you.

I would recommend running in with your tank, NOT hitting anything (which will pull all the mobs), just far enough to for Orfen to aggro you, and running back to the entrance of the nest shown below. This will minimize the number of mobs that rush you when you hit Orfen. Once the mobs all rush in, this is a great time to use hate aura and then UD. Depending on your gear minions will respawn a number of times. That said, you shouldn't get 'rushed' like you did the first time.

Orfen is beefy, expect the battle to take a while, but it is not that hard as far as skill required compared to other bosses.

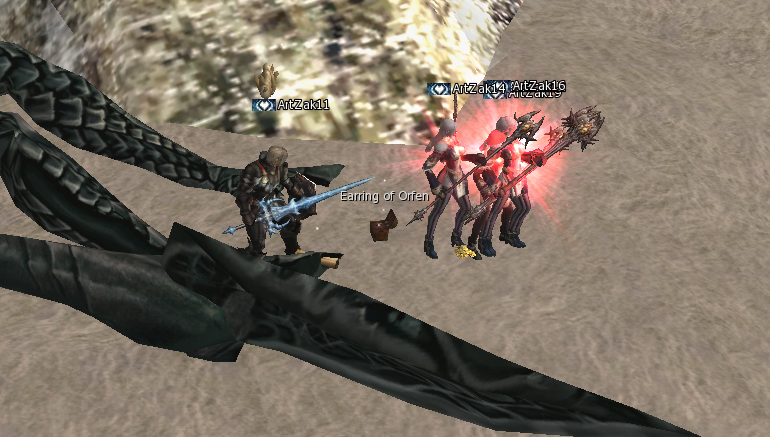
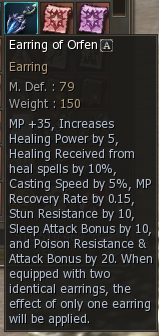
Reward: For your time Orfen will drop her earring. It has minor boosts to stats and is largely worn by mages/healers due to the casting speed buff.

-
 1
1
-
-
On 6/7/2022 at 8:25 AM, ChadiK1 said:
Hello can anyone help me with adr?
First I had problem with verification server(fixed thanks to this forum)
Second problem Out of date key. Tried moving it to flashdisk but no changes.
If you PM me on Discord I will try to help you via TeamViewer
-
yeah, not sure which version of windows you are running there but here on Windows 10, have to set to run on Windows 7
-
17 hours ago, STEREOGANG said:
wrong link, can you post a working one?
-
 1
1
-
-
I've really enjoyed my time here, gotten to do things I haven't doing in a long time and playing with some old friends as well. It's pretty unique server setup and very well balanced. Community is good, lots of helpful players no matter your activity level. Enjoy!
-
My fiance had this issue, I think uninstalling and reinstalling is what did it. Can't remember if I had to do more than that or not, I know there was a bunch of similar topics on reddit.
-
 1
1
-
-
having the same issue
-
Going to need a little more information than "Not work". It has, and continues to work fine for me.
-
 1
1
-






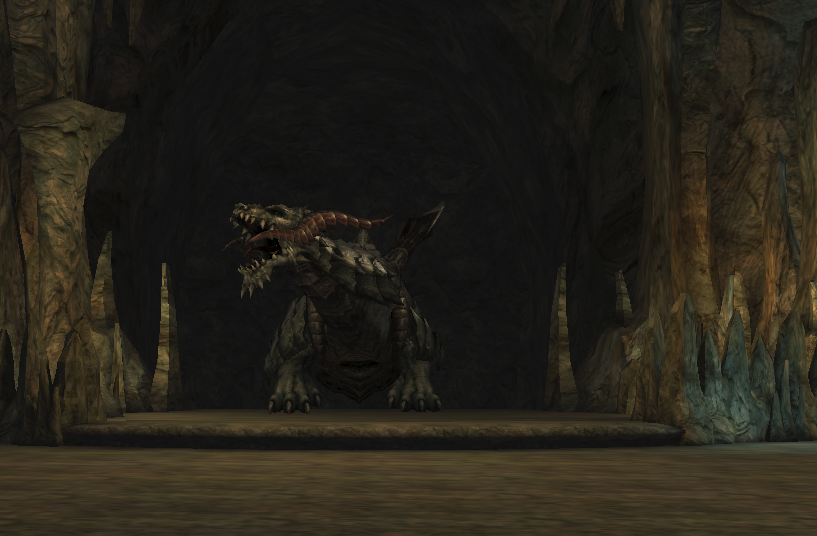
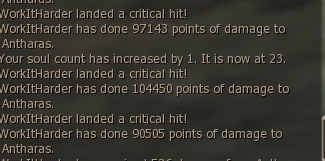
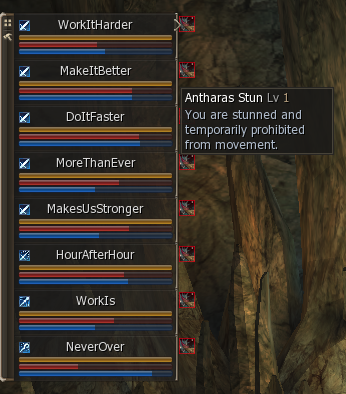

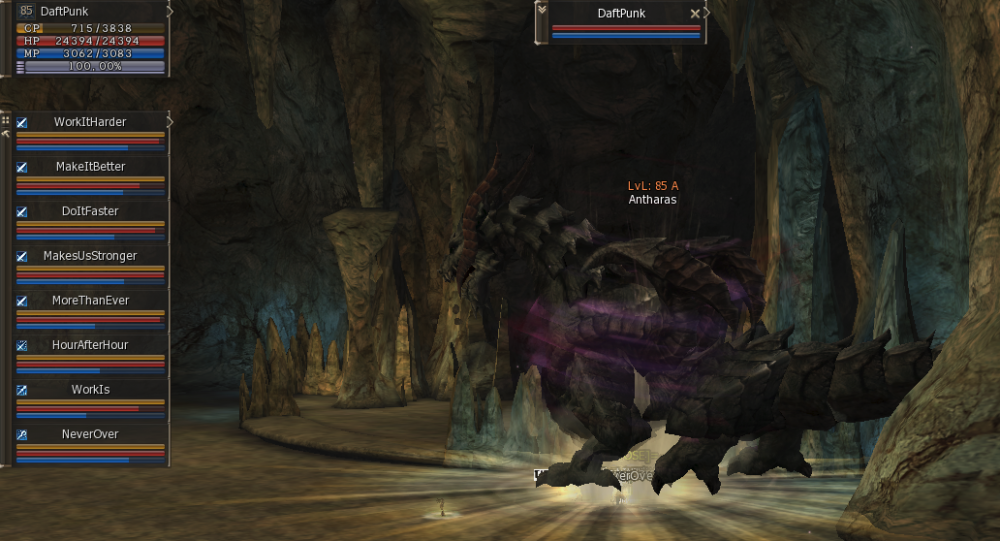



 <--Imagine taking a screenshot in this moment.



Problem with Boss Beleth :(
in Support
Posted
@TheWitcher I have never done this boss but I would like to try. I will do some research and watch some videos of what is required and see if I can get there. Will report back with findings and see if anything is broken. Thanks for reporting a potential issue.
~Art